YAPI配置Gitlab登录
YAPI 作为优秀的接口管理工具,尤其是可以在内网部署,是很多小公司的选择;
YAPI内置一套用户系统,虽然可以配置LDAP授权,但是很多企业并没有相关的用户中心可以对接,所以我们这里选择接入gitlab授权;
gitlab授权是使用插件接入的,这里使用的gitlab版本是
GitLab Community Edition 8.11.3
插件地址:
https://github.com/cyj0122/yapi-plugin-gitlab
注意:nodejs版本要求 > v10.0.0,否则会编译失败;
下载gitlab登录插件
cd <yapi install dir>/vendors
npm install https://github.com/cyj0122/yapi-plugin-gitlab.git
修改 <yapi installation dir>/config.json;添加下面的代码;
注意:"loginPath"一定要修改为v3,v4是高版本gitlab支持的。
下面的appId、appSecret、accessToken都替换为在gitlab后台生成的值。
"plugins": [{
      "name": "gitlab",
      "options": {
          "host" : "https://git.in.codoon.com/",
          "redirectUri" : "http://yapi.codoon.com/api/plugin/oauth2/callback",
          "appId" : "<your appId>",
          "appSecret" : "<your appSecret>",
          "accessToken": "<your accessToken>",
          "loginPath": "/api/v3/user",
          "authPath" : "/oauth/authorize",
          "tokenPath" : "/oauth/token",
          "emailKey" : "email",
          "userKey" : "username",
          "emailPostfix" : "@codoon.com"
      }
  }]
修改vendors/client/plugin-module.js文件;添加下面的代码;
"gitlab": {
        module: require('yapi-plugin-gitlab/client.js'),
        options: {
            "host": "https://git.in.codoon.com/",
            "redirectUri": "http://yapi.codoon.com/api/plugin/oauth2/callback",
            "appId" : "<your appId>",
              "appSecret" : "<your appSecret>",
              "accessToken": "<your accessToken>",
            "loginPath": "/api/v3/user",
            "authPath": "/oauth/authorize",
            "tokenPath": "/oauth/token",
            "emailKey": "email",
            "userKey": "username",
            "emailPostfix": "@codoon.com"
        }
    },
打包build-client
npm run build-client
常见问题
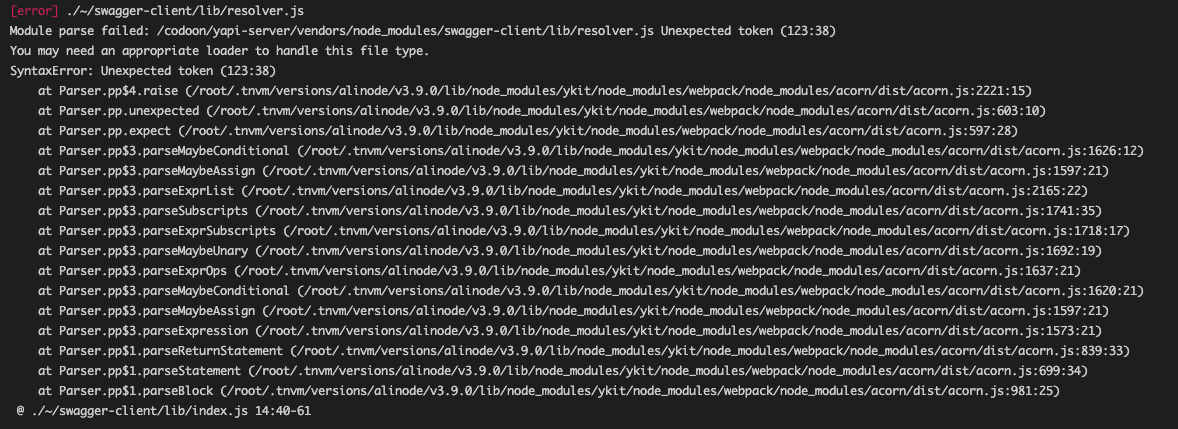
1、遇到 ykit pack -m 提示编译失败

是因为swagger没有转义,要修改下根目录的ykit.config.js,在exclude中排除一下,大概在82行;
exclude: isWin ? /(tui-editor|node_modules\\(?!_?(yapi-plugin|json-schema-editor-visual)))/ : /(tui-editor|node_modules\/(?!_?(yapi-plugin|swagger-client|json-schema-editor-visual)))/
2、eslint报错
添加下面规则
"react/no-deprecated": "off",
3、登录失败
修改node_modules/yapi-plugin-gitlab/ 下面的api的v4修改成v3
4、gitlab升级到https之后,因为gitlab的登录插件支持的链接是http的,所以会报错说授权失败,所以我们要修改下,使用https就可以了,报错的详细信息如下所示

通过打断点,查看,报错误:

我们将文件 vendors/node_modules/yapi-plugin-gitlab/controller/oauth2Controller.js 顶部引入的http换成https就可以了;
