macOS使用常见技巧
软件下载:https://www.torrentmac.net/
1、某些进程CPU占用高
Mac系统mds、mds_stores、mdworker疯狂工作的问题;
有时候发现, MacOS中, 有个叫做mds_stores的进程占了好多CPU, 这个进程是为Spotlight创建索引的,只要把这个索引的关掉就好了,但是关掉之后Spotlight就不能用了,所以注意取舍
下面的命令是关闭索引
sudo mdutil -a -i off要是使用的话,打开就行了
sudo mdutil -a -i on注意:这个其实还是不建议关闭的,否则mac的搜索功能就不可用了。
也可以在Spotlight设置中忽略掉经常变动的文件和不需要搜索的文件,例如代码中的依赖包等,将不需要索引的文件添加到这里。

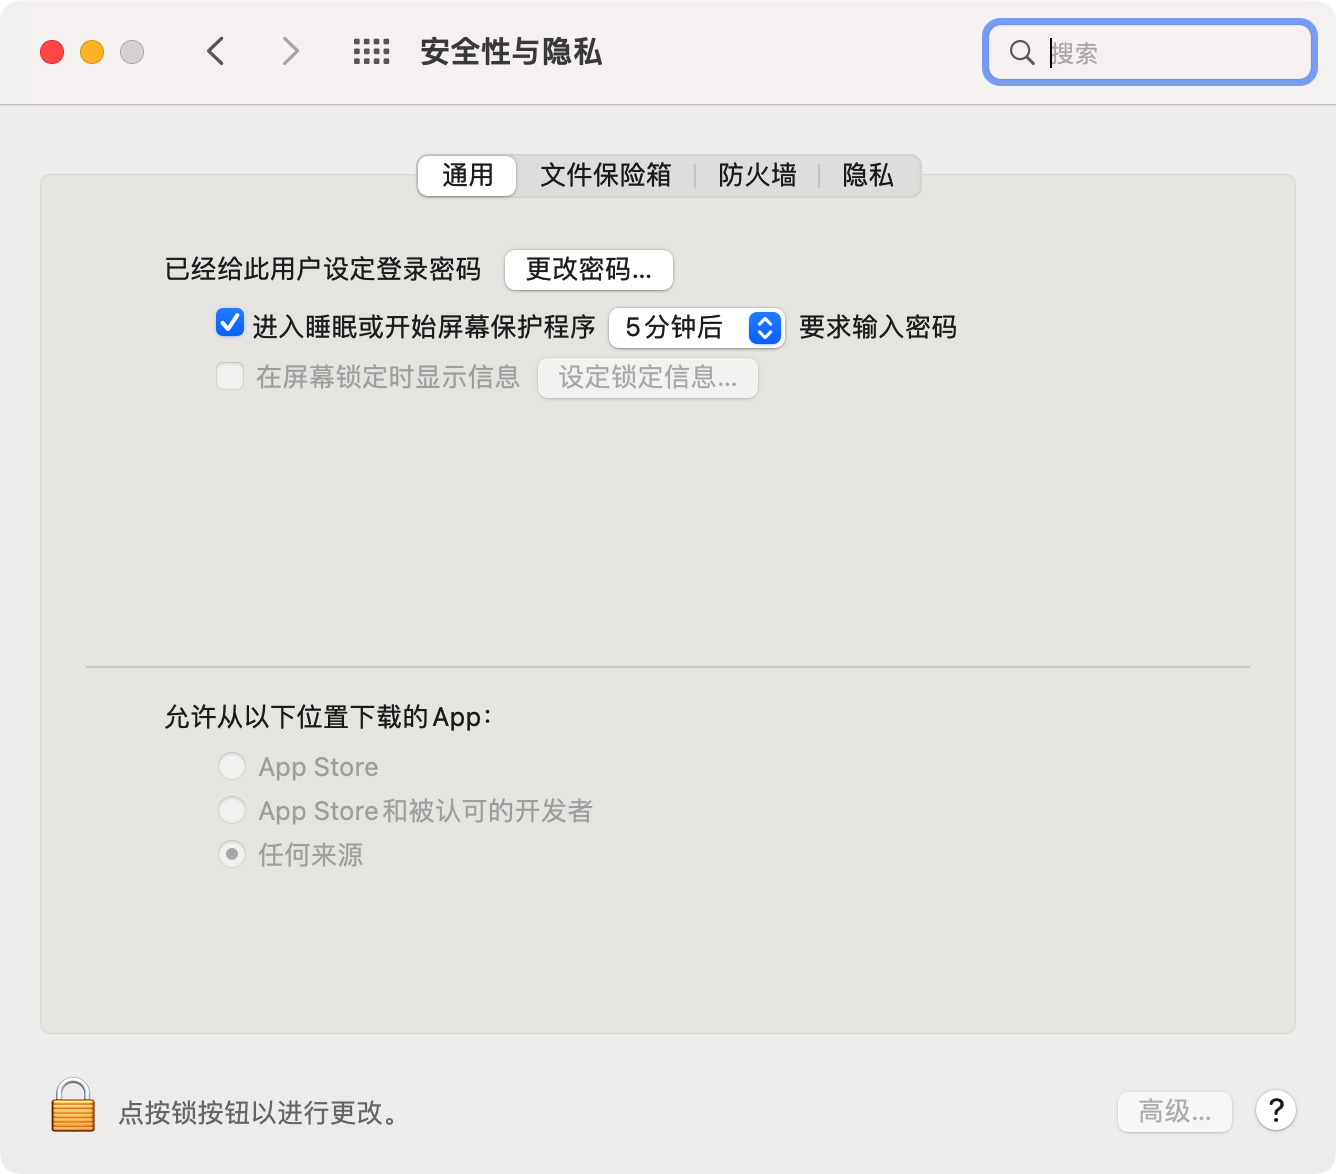
2、安装所有来源的软件
下载第三方软件时会安装失败,需要开启安装所有来源的软件
sudo spctl --master-disable修改完成,打开偏好设置,查看多了一项“任何来源”,选中就可以了
显示安装包已经损坏,执行下面的命令就能解决
codesign --force --deep --sign - /Applications/Another\ Redis\ Desktop\ Manager.app

sudo xattr -r -d com.apple.quarantine /Applications/Another\ Redis\ Desktop\ Manager.app
3、设置开机启动服务
在/Library/LaunchDaemons/目录下面创建plist文件:
<?xml version="1.0" encoding="UTF-8"?>
<!DOCTYPE plist PUBLIC "-//Apple//DTD PLIST 1.0//EN" "http://www.apple.com/DTDs/PropertyList-1.0.dtd">
<plist version="1.0">
  <dict>
    <key>Label</key>
    <string>homebrew.mxcl.nginx</string>
    <key>RunAtLoad</key>
    <true/>
    <key>KeepAlive</key>
    <false/>
    <key>ProgramArguments</key>
    <array>
        <string>/usr/local/opt/nginx/bin/nginx</string>
        <string>-g</string>
        <string>daemon off;</string>
    </array>
    <key>WorkingDirectory</key>
    <string>/usr/local</string>
  </dict>
</plist>
首先我们要保证能正常运行,设置开机启动:
sudo launchctl load -w /Library/LaunchDaemons/xxx.plist服务如果需要读取一些文件,我们就需要使用特定的用户来启动服务,例如启动nginx的时候,如果目录没有权限访问就会导致报错,所以我们在启动文件中要加上UserName字段,但这不是必须的。
<?xml version="1.0" encoding="UTF-8"?>
<!DOCTYPE plist PUBLIC "-//Apple//DTD PLIST 1.0//EN" "http://www.apple.com/DTDs/PropertyList-1.0.dtd">
<plist version="1.0">
  <dict>
    <key>Label</key>
    <string>homebrew.mxcl.nginx</string>
    <key>RunAtLoad</key>
    <true/>
    <key>KeepAlive</key>
    <false/>
+   <key>UserName</key>
+   <string>bingo</string>
    <key>ProgramArguments</key>
    <array>
        <string>/usr/local/opt/nginx/bin/nginx</string>
        <string>-g</string>
        <string>daemon off;</string>
    </array>
    <key>WorkingDirectory</key>
    <string>/usr/local</string>
  </dict>
</plist>
MacOS 启动守护进程配置文件的路径:
1、/System/Library/LaunchAgents
2、/System/Library/LaunchDaemons
3、/Library/LaunchDaemons
4、/Library/LaunchAgents
5、~/Library/LaunchAgents
plist文件配置详情:
| Key | Description | Required |
|---|---|---|
| Label | The name of the job | yes |
| ProgramArguments | Strings to pass to the program when it is executed | yes |
| UserName | The job will be run as the given user, who may not necessarily be the one who submitted it to launchd. | no |
| inetdCompatibility | Indicates that the daemon expects to be run as if it were launched by inetd | no |
| Program | The path to your executable. This key can save the ProgramArguments key for flags and arguments. | no |
| onDemand | A boolean flag that defines if a job runs continuously or not | no |
| RootDirectory | The job will be chrooted into another directory | no |
| ServiceIPC | Whether the daemon can speak IPC to launchd | no |
| WatchPaths | Allows launchd to start a job based on modifications at a file-system path | no |
| QueueDirectories | Similar to WatchPath, a queue will only watch an empty directory for new files | no |
| StartInterval | Used to schedule a job that runs on a repeating schedule. Specified as the number of seconds to wait between runs. | no |
| StartCalendarInterval | Job scheduling. The syntax is similar to cron. | no |
| HardResourceLimits | Controls restriction of the resources consumed by any job | no |
| LowPriorityIO | Tells the kernel that this task is of a low priority when doing file system I/O | no |
| Sockets | An array can be used to specify what socket the daemon will listen on for launch on demand | no |
参考:https://blog.csdn.net/kevinlou2008/article/details/49155497
4、开机启动nginx
mac重启后,每次都需要重新启动nginx,比较麻烦;
如果我们是使用brew安装的nginx,我们先查询nginx相关的文件:
1、查看相关文件
➜  ~ brew ls nginx
/usr/local/Cellar/nginx/1.19.5/bin/nginx
/usr/local/Cellar/nginx/1.19.5/homebrew.mxcl.nginx.plist
/usr/local/Cellar/nginx/1.19.5/html -> ../../../var/www
/usr/local/Cellar/nginx/1.19.5/on
/usr/local/Cellar/nginx/1.19.5/share/man/man8/nginx.8
/usr/local/Cellar/nginx/1.19.5/share/nginx/ (2 files)
2、拷贝服务文件
sudo cp /usr/local/Cellar/nginx/1.19.5/homebrew.mxcl.nginx.plist /Library/LaunchDaemons3、启动服务
sudo launchctl load -w /Library/LaunchDaemons/homebrew.mxcl.nginx.plist-w参数是如果服务没有启动,现在立刻启动
➜  ~ sudo launchctl load --help
Usage: launchctl load <service-path, service-path2, ...>
        -w      If the service is disabled, it will be enabled. In previous
                versions of launchd, being disabled meant that a service was
                not loaded. Now, services are always loaded. If a service is
                disabled, launchd does not advertise its service endpoints
                (sockets, Mach ports, etc.).
        -F      Forcibly load the service. This flag will ignore the service's
                disabled state. In previous versions of launchd, this flag
                would also ignore the ownership and permissions of the
                specified launchd.plist. This is no longer the case. Note that,
                unlike the -w flag, this flag will not  modify the service's
                disabled state; it will instead only ignore it for the load
                operation.
        -S <session>
                This flag takes a single argument which is the name of a
                session and may only be used when loading agents. All daemons
                exist within the same session, which is the system session.
                Agents may designate which sessions they can be loaded in with
                the LimitLoadToSessionType key.
        -D <domain>
                Loads launchd.plist(5) files from the specified domain.
                Depending on the current execution context, launchctl will look
                in a LaunchDaemons or LaunchAgents directory for
                launchd.plists. When running in the system's execution context
                (i.e. when run as root via a root shell or with sudo), the
                LaunchDaemons directory is searched. When running in a user's
                context (i.e. run normally from a shell), the LaunchAgents
                directory is searched. Valid domains are:
                system
                Searches /System/Library for either daemons or agents.

                local
                Searches /Library for either daemons or agents.

                network
                Searches /Network. This session type is no longer valid.

                user
                Searches the home directory of the calling user for agents
                only. Daemons may not be loaded from this
                domain.
5、利用shell上传文件到ftp
#!/bin/bash
#指定所要上传文件的日期
FILE_NAME="package-lock_`date +%Y%m%d%H%M`.json"
cp package-lock.json $FILE_NAME

# 上传文件到FTP服务器
ftp -ivn <<EOF
  open 192.168.31.90 21
  user admin 123456
  binary
  lcd ./
  cd /
  put $FILE_NAME
  quit
EOF

# 判定文件是否上传成功
if ( [ $? -eq 0 ] ) then
    rm $FILE_NAME
    echo "Upload $FILE_NAME to romote FTP server successful."
else
    echo "Upload files failed, pls check."
fi
6、配置JAVA_HOME环境变量
macOS 安装jdk之后,jdk存储的位置比较难找,这里的JDK是用pkg安装的。
路径:/Library/Java/JavaVirtualMachines/jdk-15.0.1.jdk/Contents/Home
我们可以修改.zshrc文件,添加下面的变量
export JAVA_HOME=/Library/Java/JavaVirtualMachines/jdk-15.0.1.jdk/Contents/Home
export PATH=$JAVA_HOME/bin:$PATH
现在在terminal中打印java就可以了,其他的相关程序也可以运行了。
安装OpenJDK
当然我们也可以使用brew安装其他版本的OpenJDK,例如:/usr/local/Cellar/openjdk@8/1.8.0+275,M1的Mac路径在 /opt/homebrew 下面。
我们列一下这个目录,bin下面的就是可执行文件,当前目录就是标准的jdk目录:
➜  ~ ll /usr/local/Cellar/openjdk@8/1.8.0+275
total 56
-rw-r--r--   1 user  staff   996B  1 14 17:53 INSTALL_RECEIPT.json
-rw-r--r--   1 user  staff    19K 11  5  2020 LICENSE
-rw-r--r--   1 user  staff   1.5K 11  5  2020 README
drwxr-xr-x  45 user  staff   1.4K 11  5  2020 bin
drwxr-xr-x  10 user  staff   320B 11  5  2020 include
drwxr-xr-x   3 user  staff    96B  1 14 17:53 libexec
配置JAVA_HOME
export JAVA_HOME=/usr/local/Cellar/openjdk@8/1.8.0+275
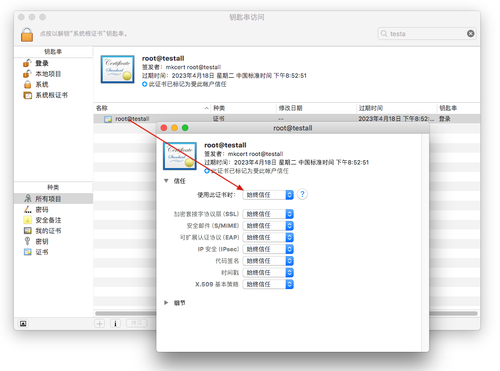
export PATH=$JAVA_HOME/bin:$PATH7、信任自定义浏览器证书
查看浏览器中证书的名称,这个证书是我们使用mkcert来生成的
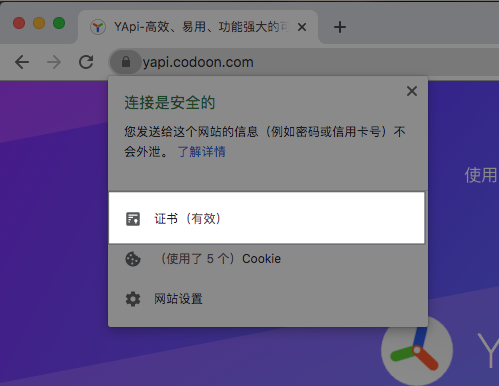
查看名称
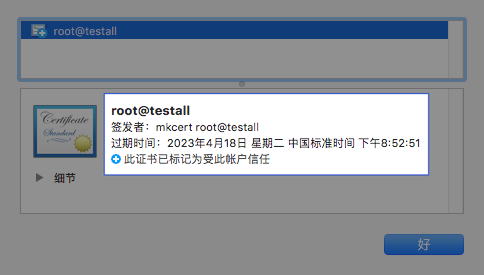
在启动台找到“密钥串”打开,搜索对应的证书,选择信任;
8、使用mkcert制作证书
使用mkcert制作证书;https://github.com/FiloSottile/mkcert
mac安装
brew install mkcert
brew install nss # if you use Firefox
生成证书
mkcert -key-file key.pem -cert-file cert.pem example.com *.example.com快速生成证书(nginx)
mkcert www.test.com
mkcert *.test.com # 所有的test.com的三级域名都可以使用
首先要信任该证书
mkcert --install常见问题
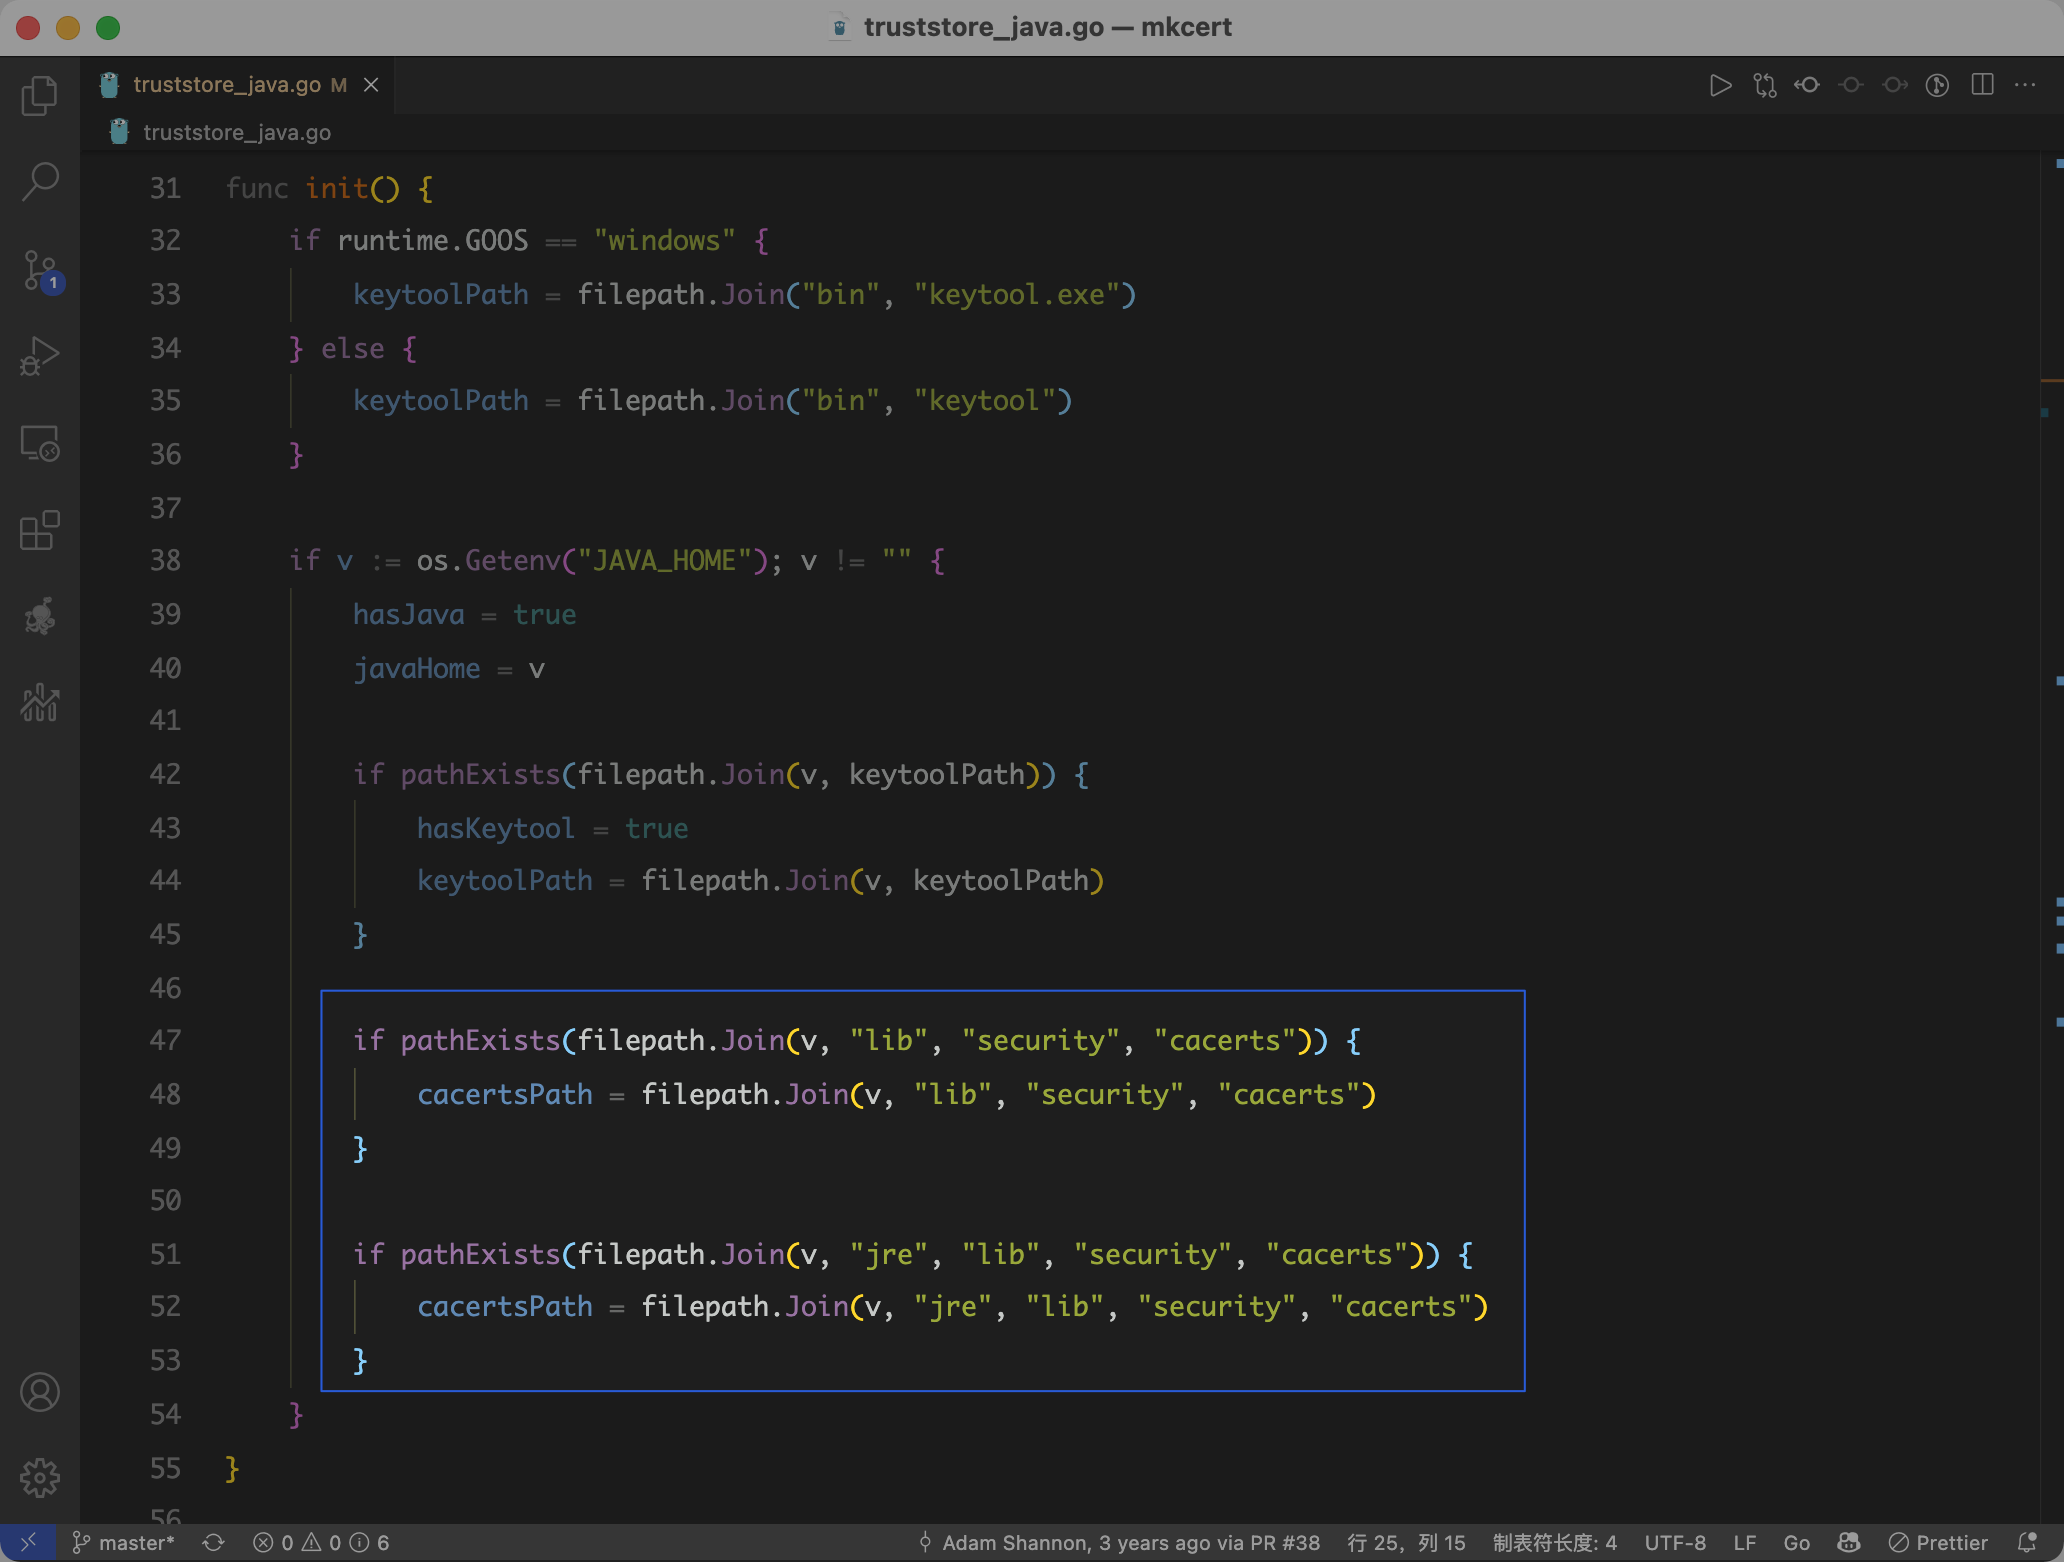
要是执行mkcert的时候报 keytool -list 相关的错误,请检查JAVA_HOME环境变量是否设置,注意openJDK不可以,必须要使
用Oracle提供的jdk,因为我看了下源码,去查看key的时候查找的路径是$JAVA_HOME/jre/lib/security/,
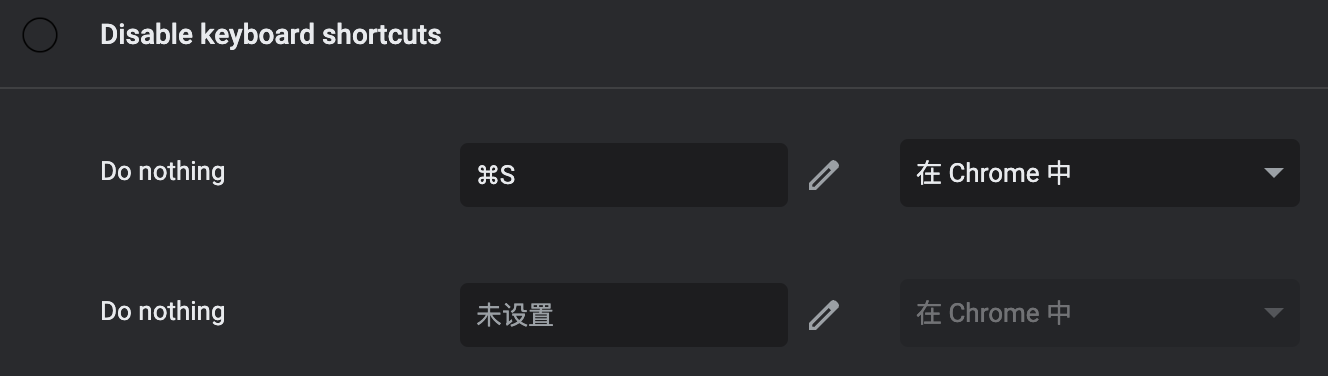
9、禁用chrome的ctrl+s快捷键
如果是单纯想禁用快捷键的话, Disable keyboard shortcuts. 完美解决chrome误触发快捷键的烦恼. 安装好以后在chrome://extensions/shortcuts添加禁用即可.
10、升级到macos13之后git报错
Unable to negotiate with 120.27.239.136 port 22: no matching host key type found. Their offer: ssh-rsa,ssh-dss
fatal: 无法读取远程仓库。

请确认您有正确的访问权限并且仓库存在。
在.ssh/config的Host里面添加,后重启电脑
# HostKeyAlgorithms +ssh-rsa
# PubkeyAcceptedAlgorithms  +ssh-rsa

# demo
Host *
  ForwardAgent yes
  IdentityFile ~/.ssh/id_rsa_old
  ServerAliveInterval  60
  ServerAliveCountMax  60
  HostKeyAlgorithms +ssh-rsa
  PubkeyAcceptedAlgorithms  +ssh-rsa
11、查看和修改hostname
# 查看hostname, 还可以获取ComputerName,LocalHostName
# LocalHostName 就是共享的时候别人看到的名字,一般在隔空投送中会展示
scutil --get HostName # macbookm1pro
# 临时设置hostname,重启后生效
hostname macbookm1pro
# 永久生效,设置之后重启也是有效的
scutil --set HostName macbookm1pro
12、使用自动操作实现转化webp
macOS的自动操作是一个很强大的功能,可以将流程化的东西实现自动运行。转换图片格式是比较常见一个功能,webp的图片相对于png要小一些,目前有很的浏览器也是支持的。
首先我们使用brew安装webp程序,如果比较慢需要梯子。
brew install webp安装成功之后会有一个cwep的程序,如果不知道在哪里,我们可以运行下面命令查看,M1的mac一般是/opt/homebrew/bin/cwebp。
which cwebp # 输出 /opt/homebrew/bin/cwebp打开自动操作app开始添加自动化逻辑

新建一个“快速操作”

进行下面的配置

1、接收图像文件时
2、运行shell脚本
注意下面的cwebp的路径是你自己安装的路径,如果选中了多个图片也可以循环处理
for f in "$@"
do
  /opt/homebrew/bin/cwebp "$f" -o "${f%.*}.webp"
done
3、展示一个通知
待保存后,我们打开刚刚创建的“快速操作”,安装在当前电脑即可(选择:“自动操作安装器”)

我们再右键点击图片的时候会展示我们添加的操作,执行之后会发现在当前的文件夹生成一个同名的webp文件,至此完成。

运行后生成了webp并且在右上角展示了通知

13、禁止.DS_store生成文件
禁止.DS_store生成:
defaults write com.apple.desktopservices DSDontWriteNetworkStores -bool TRUE恢复.DS_store生成:恢复.DS_store生成:
defaults delete com.apple.desktopservices DSDontWriteNetworkStores.DS_Store (英文全称 Desktop Services Store)
[1] 是一种由苹果公司的 Mac OS X 操作系统所创造的隐藏文件,目的在于存贮目录的自定义属性,例如文件们的图标位置或者是背景色的选择。
[2]该文件由 Finder 创建并维护,类似于 Microsoft Windows 中的 desktop.ini 文件。
14、让VMware Fusion虚拟机后台运行
在VMware Fusion窗口启动虚拟机之后,同时按下 Command+Option+Shift+Esc 可以关闭VMware窗口并且保持虚拟机在后台运行。
15、查看环境变量
在Mac电脑上,可以通过在终端中输入 echo $PATH 等命令来查看特定的环境变量。 此外,还可以使用 env 命令来查看所有的环境变量。 了解了当前的环境变量后,我们可以开始修改它们。 在Mac电脑上,可以使用 export 命令来设置或修改环境变量。
16、浏览器错误ERR_CONNECTION_CLOSED
请求出现了错误 ERR_CONNECTION_CLOSED,但是复制了curl链接到终端执行是正确的,经过查询资料发现是clash代理导致的,关闭clash或者将对应的域名添加到clash的排除即可。
17、设置内置应用快捷键
设置 > 键盘 > 键盘快捷键 > App 快捷键
这里输入的文本和 xcode 中要一字不差;我安装了 XCFormat 插件;对应菜单 Editor > XCFormat > Format Active File
